Hey everyone, I hope you are having an incredible day today. Today, I’m gonna show you how to prepare a distinctive dish, cream cheese mousse dome cake no silicon. It is one of my favorites food recipes. This time, I am going to make it a little bit unique. This is gonna smell and look delicious.
Cream cheese mousse dome cake no silicon is one of the most popular of recent trending meals in the world. It’s enjoyed by millions daily. It is simple, it is quick, it tastes delicious. Cream cheese mousse dome cake no silicon is something which I have loved my whole life. They’re fine and they look wonderful.
Mousse Domes with Caramelized Walnuts and Caramel Mirror Glaze. Shiny Mirror Glaze Mousse Dome with Crispy Chocolate Base and Ganache Topping. • Chocolate Mousse Dome Cake (with Raspberry Jelly and Mirror Glaze). 에스프레소 초콜릿 무스케이크 만들기 : Espresso chocolate mousse cake Recipe - Cooking tree 쿠킹트리*Cooking ASMR. #creamcheese #homemadecreamcheese #sweetbites. How to Make Cream Cheese - One Ingredient Homemade Cream Cheese Recipe. Add cream cheese, melted chocolate, cocoa powder, and sugar to a large bowl and whisk, either by Whisk until the cream develops a mousse-y texture and soft peaks form.
To get started with this recipe, we have to first prepare a few ingredients. You can cook cream cheese mousse dome cake no silicon using 22 ingredients and 12 steps. Here is how you cook it.
The ingredients needed to make Cream cheese mousse dome cake no silicon:
- Get Oreo biscuits
- Make ready Almond powder (5-6almonds)
- Get Soft butter
- Make ready Milk
- Take Milk cream
- Prepare Milk cream
- Make ready salt
- Get For cake layer -
- Get All ingredients of plain vanilla cake shown in my 56 bhog recipe
- Make ready For mousse
- Prepare Cream cheese
- Make ready Plain yogurt
- Take Powder sugar
- Make ready Whipped cream
- Make ready Vanilla axtract
- Take Cocoa powder
- Make ready Rasberry jelly powder or (any other u have available)
- Make ready For ganache dark chocolate
- Get Colored sprinklers a few for garnishing
- Get Milk cream
- Prepare Chocolate coated colored candy ball for garnishing
- Make ready Silver balls for garnishing
A wide variety of mousse cake dessert options are available to you, such as material, feature, and certification. These chocolate mousse praline domes (or bombes) might look fancy and difficult to make but they are In the meantime, you prepare the vanilla sponge cake that will make the base of the domes. In a bowl of a standing mixer, fitted with the paddle with silicon wings, if you do not have this, you Stop the mixer and scrape the sides and, the bottom of the bowl, with a silicone spatula, then add the melted and completely cooled. I think the whipped cream cheese works a bit better for a no-bake chocolate mousse Another great recipe for Chocolate Mousse, which requires a few more steps, but is totally worth the effort in my opinion, is my Chocolate Mousse Cake Recipe.
Steps to make Cream cheese mousse dome cake no silicon:
- Firstly we have to make a base:-for this crush oreo biscuits by putting them in a ziplock bag and rolling on with the help of a rolling pin then transfer the biscuit crush from ziplock bag to a container and mix soft butter, almond powder,salt, vanilla extract and little bit of milk to combine all the ingredients well and make a soft dough like consistency
- Make a ball of the dough and roll it on a butter paper with the help of a rolling pin about 1/2 inch thick..cut roundles with a round cookie cutter or a small cake mould..keep it in fridge for about one hour to set
- For mousse mix cream cheese and add powder sugar then add plain yogurt, cocoa powder, vanilla essence and whipped cream and give a good mix
- Soak raspberry jelly powder in 2-3 spoons of hot water for about 10 minutes then add in cream cheese mixture and stir nicely
- Set cling wrap in glass bowls, pour the cream cheese mousse and keep in refrigerator overnight
- Make 1 inch thick vanilla cake and cut in same round shape as we have cut biscuit base
- For ganache cut the dark chocolate in small pieces,add cream and microwave 30 seconds,stir and repeat the process till chocolate melts completely add butter and mix it nicely to get smooth, silky pouring texture..let it to cool at the temperature of 30°c
- Keep the mousse out of refrigerator, with grate attention remove the cling wrap and set on a wire rack and pour the chocolate ganache over it..let it to drizzle the excess ganache
- Assembling first place biscuit base then vanilla cake roundle then care fully place cream cheese mousse dome covered with chocolate ganache
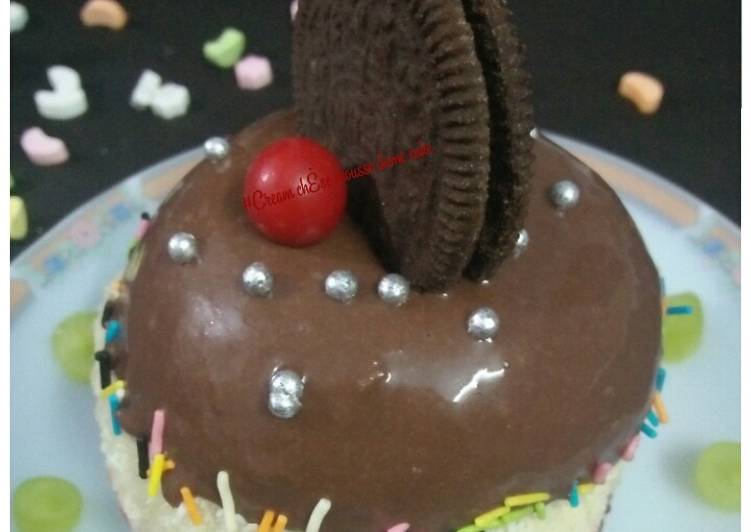
- Finally set an oreo biscuit and a colorfull chocolate candy ball on top
- Stick few colored sprinklers at the side of the mousse dome
- Your cream cheese mousse dome cake is now done..keep in fridge for at least one hour to set then serve
In a bowl of a standing mixer, fitted with the paddle with silicon wings, if you do not have this, you Stop the mixer and scrape the sides and, the bottom of the bowl, with a silicone spatula, then add the melted and completely cooled. I think the whipped cream cheese works a bit better for a no-bake chocolate mousse Another great recipe for Chocolate Mousse, which requires a few more steps, but is totally worth the effort in my opinion, is my Chocolate Mousse Cake Recipe. This Cream Cheese Pound Cake has a wonderful rich and buttery flavor, moist texture, and a golden brown crust that is both sweet and crisp. Pound Cakes have been around for a long time. And I think the reason why they never go out of style, is that they're just a great tasting cake.
So that’s going to wrap it up with this special food cream cheese mousse dome cake no silicon recipe. Thank you very much for reading. I am confident you can make this at home. There’s gonna be more interesting food at home recipes coming up. Remember to save this page on your browser, and share it to your loved ones, friends and colleague. Thank you for reading. Go on get cooking!